Overview
This tutorial outlines the process of planning, implementing, and commissioning a regional solar-plus-storage project that incorporates anti-hail photovoltaic (PV) panels. Based on the recent achievements of an Australian renewables retailer—which completed three new solar and battery projects and introduced a bespoke offer for local residents—we break down the essential phases. This guide covers feasibility studies, technology selection (specifically anti-hail modules), grid integration, battery sizing, community engagement, and commissioning. By following these steps, energy retailers and project developers can replicate a resilient, community-focused renewable energy system that withstands extreme weather and enhances regional power offers.
Prerequisites
- Understanding of solar PV and battery storage systems: Familiarity with solar panel specifications, inverter types, and battery chemistries (e.g., lithium-ion).
- Site assessment data: Information on local solar irradiation, weather patterns (especially hailstorm frequency), grid connection points, and land availability.
- Regulatory knowledge: Knowledge of Australian renewable energy incentives, grid connection standards (AS/NZS 4777.1), and local council planning approvals.
- Financial modeling skills: Ability to calculate Levelized Cost of Energy (LCOE), return on investment (ROI), and power purchase agreement (PPA) structures.
- Community engagement plan: Strategy for communicating benefits and gathering feedback from local residents.
Step-by-Step Instructions
Step 1: Feasibility Study and Site Selection
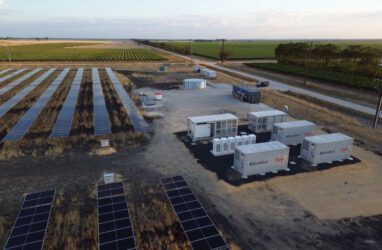
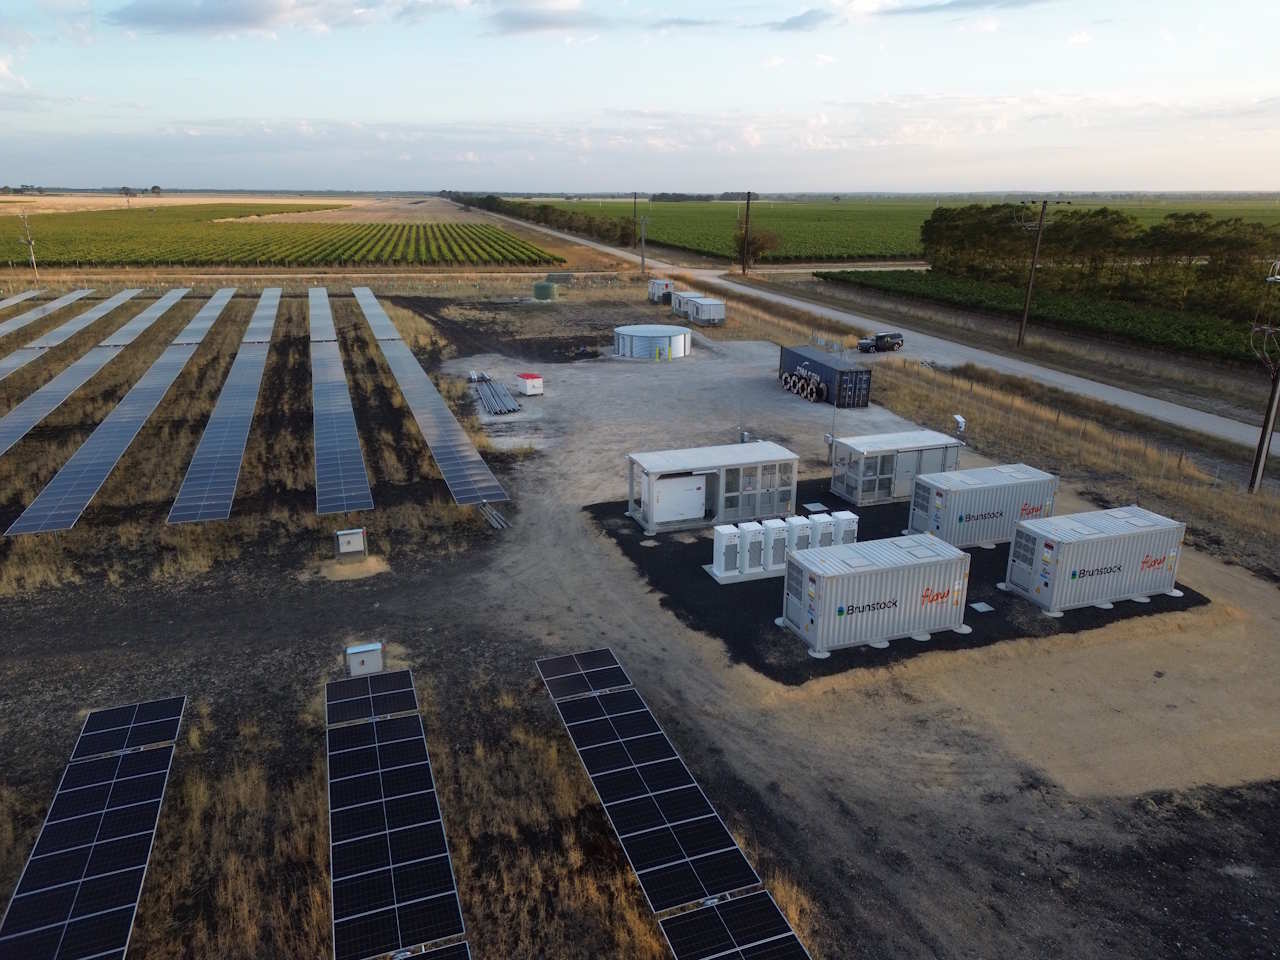
Identify potential sites in regional areas with high solar resource and risk of hailstorms. Use historical weather data to determine hail probability (e.g., parts of New South Wales and Queensland). Evaluate grid capacity and proximity to population centers. For the Australian retailer, three distinct sites were chosen, each serving a cluster of households. Create a shortlist based on land cost, solar access, and community density.
Step 2: Technology Selection—Anti-Hail PV Modules
Anti-hail panels feature reinforced glass (often up to 8 mm thick) and robust frames to withstand large hailstones. Sources from manufacturers such as Trina Solar, Longi, or Canadian Solar who offer hail-resistant variants. Key specs to compare: impact resistance rating (e.g., up to 25 mm hail at 23 m/s), power output, and temperature coefficient. Ensure modules are certified under IEC 61215 and IEC 61730 with hail test approval. The retailer integrated these panels into all three projects to guarantee longevity in severe weather.
Step 3: Battery Sizing and System Design
Determine battery capacity based on load profiles and desired independence. For regional communities, typical battery sizes range from 50 kWh to 200 kWh per project. Use software like PVsyst or HOMER to simulate generation and consumption. The retailer paired solar arrays (e.g., 100 kW to 500 kW) with lithium-ion battery storage (e.g., Tesla Powerpack or BYD) to enable peak shaving and backup power. Design the system with a bi-directional inverter for both solar and battery integration.
Step 4: Grid Connection and Regulatory Approvals
Apply to the local distribution network service provider (DNSP) for connection approval. Submit detailed electrical diagrams, protection settings, and compliance documents. In Australia, this follows the National Electricity Rules. The retailer obtained permits for three separate grid connections, coordinating with the Australian Energy Market Operator (AEMO) when necessary. Include a utility-grade transformer and switchgear to meet safety standards.
Step 5: Community Engagement and Bespoke Offer Design
Engage with local residents through town hall meetings and surveys to explain project benefits: lower electricity bills, energy resilience, and storm protection. Develop a bespoke offer, such as a discounted feed-in tariff (FiT) or a community-owned share scheme. The retailer launched a tailored pricing plan for residents within a certain radius, offering fixed low rates for solar-generated electricity and battery backup during outages. Finalize the offer details in a PPA or subscription model.
Step 6: Procurement and Installation
Procure components from verified suppliers: anti-hail panels, inverters (string or micro-inverters), battery units, mounting structures, and monitoring systems. Hire licensed electricians and structural engineers. Installation involves mounting panels on ground mounts or robust roof racks (to avoid hail damage), installing battery containers, and running cabling. The retailer staged installations over 12 months across three sites, using local labor to foster community buy-in.
Step 7: Commissioning and Testing
After installation, conduct thorough testing: verify panel output, battery charge/discharge cycles, inverter synchronization, and communication with the grid. Run a 30-day trial under various weather conditions. Test anti-hail durability by simulating impact with calibrated dents (certified by IEC). Once all systems pass, formally commission the projects. The retailer completed and commissioned all three projects simultaneously, launching the offer to residents.
Step 8: Monitoring and Maintenance
Set up real-time monitoring via an Energy Management System (EMS) to track generation, storage levels, and grid export. Schedule periodic inspections: clean panels, check battery cooling, and verify anti-hail glass integrity. Create a maintenance plan with local technicians. The retailer offers an app for residents to view their solar contribution and billing.
Common Mistakes
- Underestimating hail risk: Standard panels may shatter under severe hail, leading to downtime and replacement costs. Always choose certified anti-hail modules in hail-prone zones.
- Oversizing or undersizing battery: Inaccurate load analysis leads to either wasted capacity or insufficient backup. Use 24/7 load data for at least one year.
- Neglecting grid interconnection timelines: DNSP approvals can take weeks; engage early and factor into project schedule.
- Poor community communication: Without buy-in, residents may reject the offer. Host multiple meetings and offer transparent pricing.
- Ignoring local regulations: Environmental impact assessments or heritage overlays can stall projects. Consult local councils before proceeding.
- Using single-sourced components: Reliance on one manufacturer for anti-hail panels risks delays during supply chain disruptions. Maintain a backup supplier list.
Summary
Deploying a regional solar-battery project with anti-hail panels requires meticulous planning from feasibility through commissioning. This guide—inspired by a real retailer who completed three such projects and launched a bespoke resident offer—provides a replicable framework. Key takeaways: prioritize anti-hail technology for resilience, right-size batteries based on local loads, secure timely grid connections, and engage the community early. When executed correctly, these systems reduce energy costs, improve reliability, and withstand extreme weather, creating a win-win for retailers and regional communities.